Accessing and getting in touch with your favorite contacts has never been easier thanks to the "Friends" feature on the Apple Watch. However, this only applies to users who are running watchOS 2.2.2 and lower. When Apple issued watchOS 3, the "Friends" option was completely removed. So if you're running watchOS 3 or higher, you won't be able to follow these instructions.
How to Use the Friends List on Apple Watch
Using the side button from anywhere on the device, you can access your "Friends" list, where you'll see your contacts arranged in a circle. However, if you're running watchOS 3 or higher, the side button now gives you access to the app switcher, and "Friends" is completely gone. If you do have the "Friends" list, you can quickly call, text, and even use Digital Touch (which can send heartbeats and drawings) with those that matter the most.
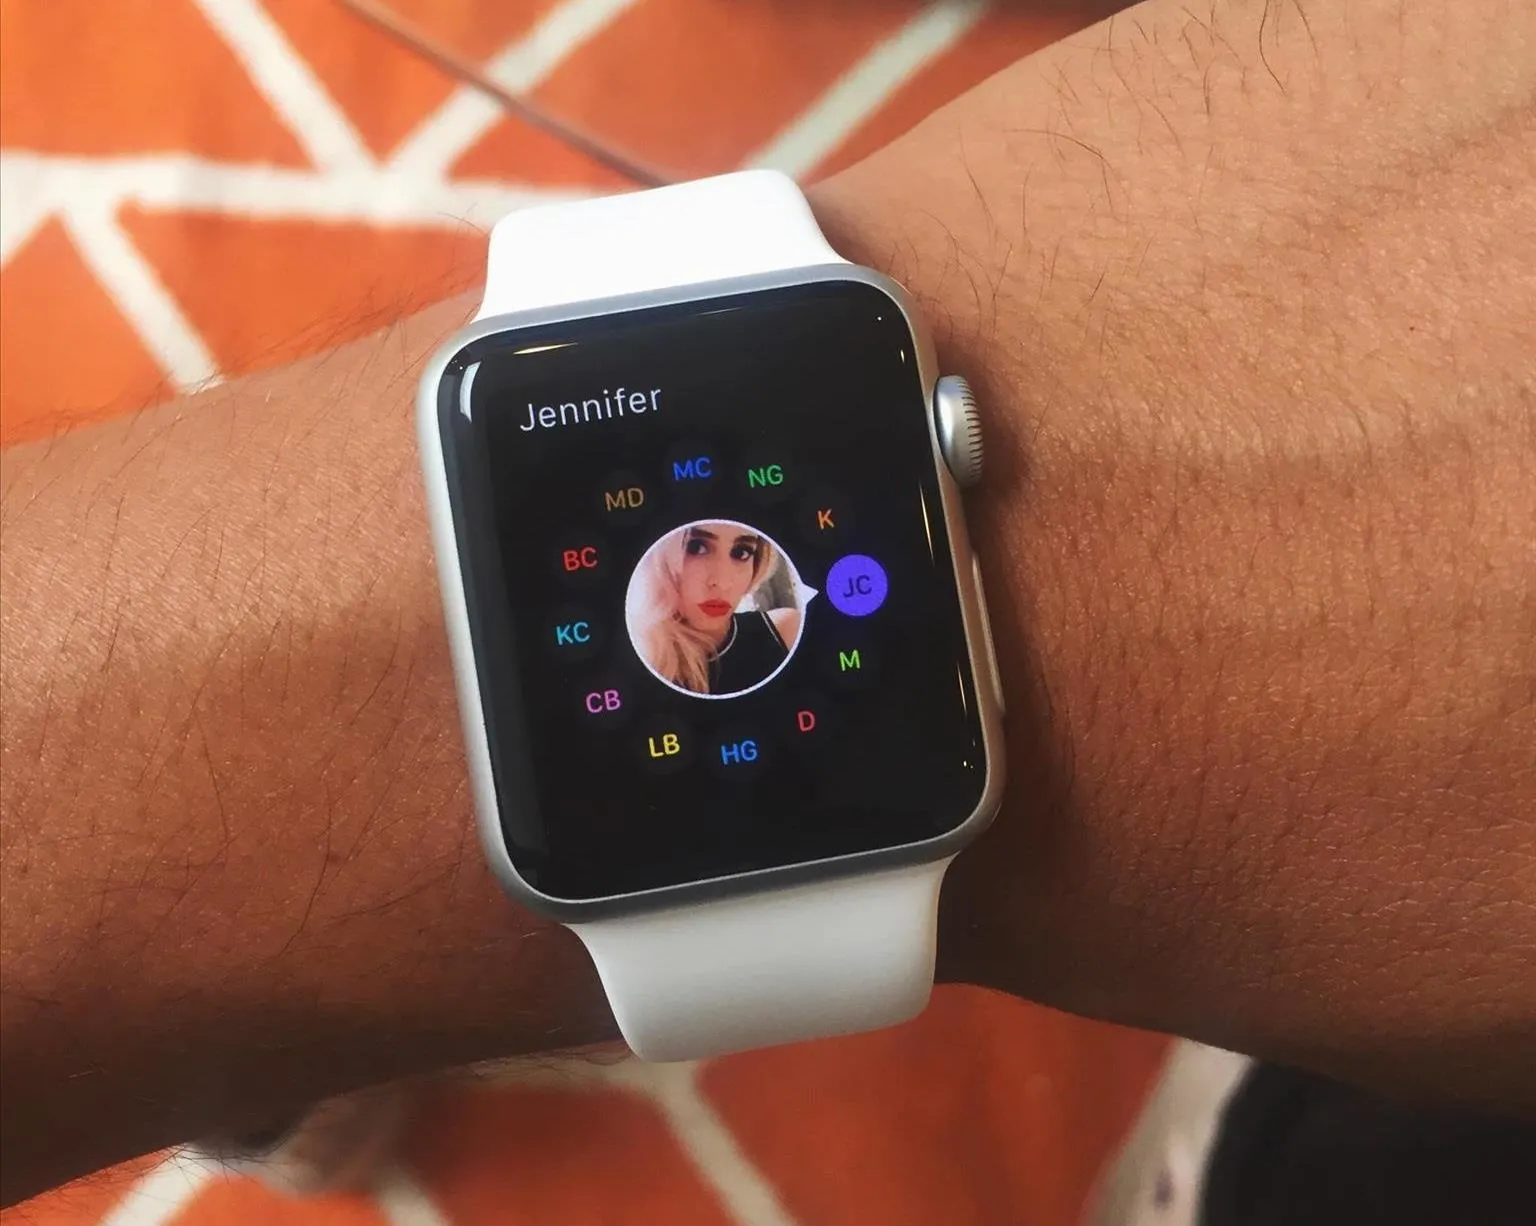
Nelson Aguilar/Gadget Hacks
If you have contacts that you've favorited on your iPhone, those will automatically appear in your "Friends" list. But as someone that personally doesn't have any favorite contacts, no one appeared. So how do you manually add and delete contacts from your "Friends" list?
How to Manage Contacts from Your 'Friends' List
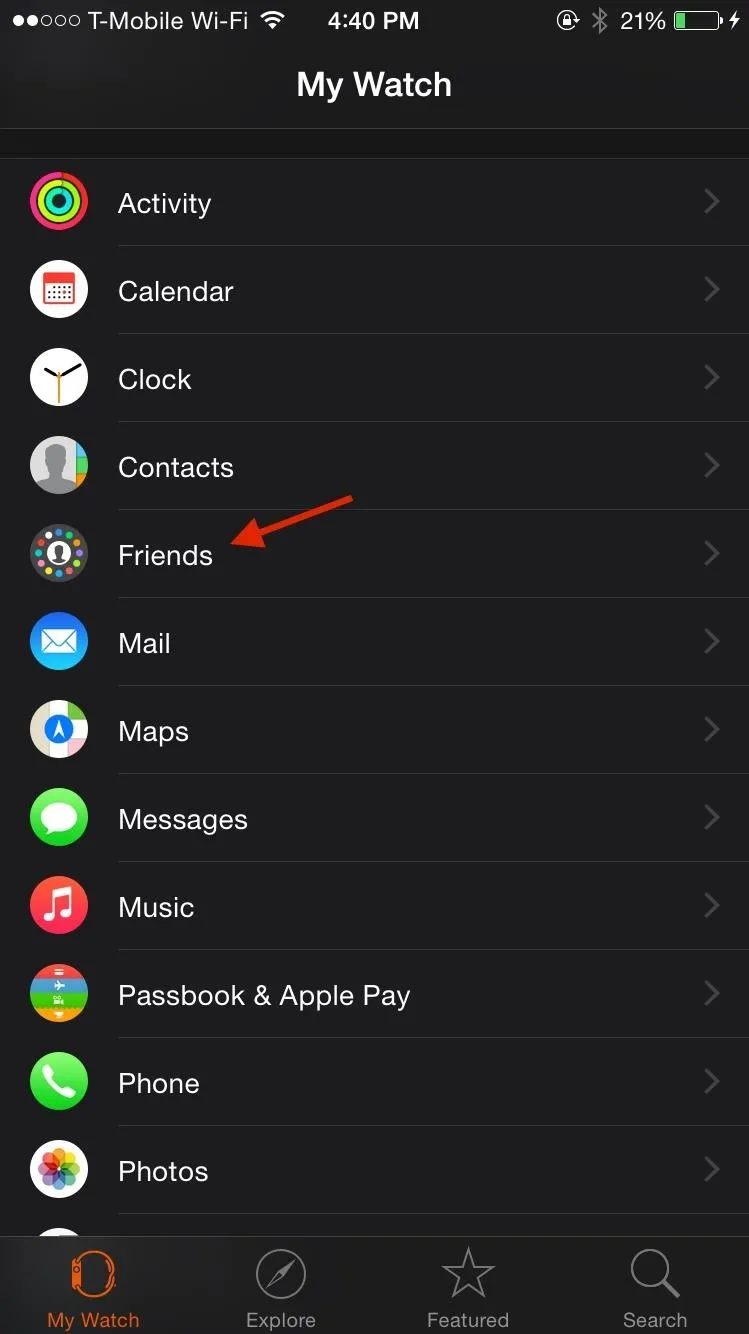
On your iPhone, go to the Apple Watch app and scroll down to "Friends." If you don't see this option, you are likely running watchOS 3 or higher. From this page, add all of your favorite contacts (up to 12), which will be organized on your Apple Watch in clockwork-fashion.
Use "Edit" at the top right to shift the placement of the contacts, as well as delete them. You can also swipe left on a contact to get rid of it. Once you're done, just leave the app.
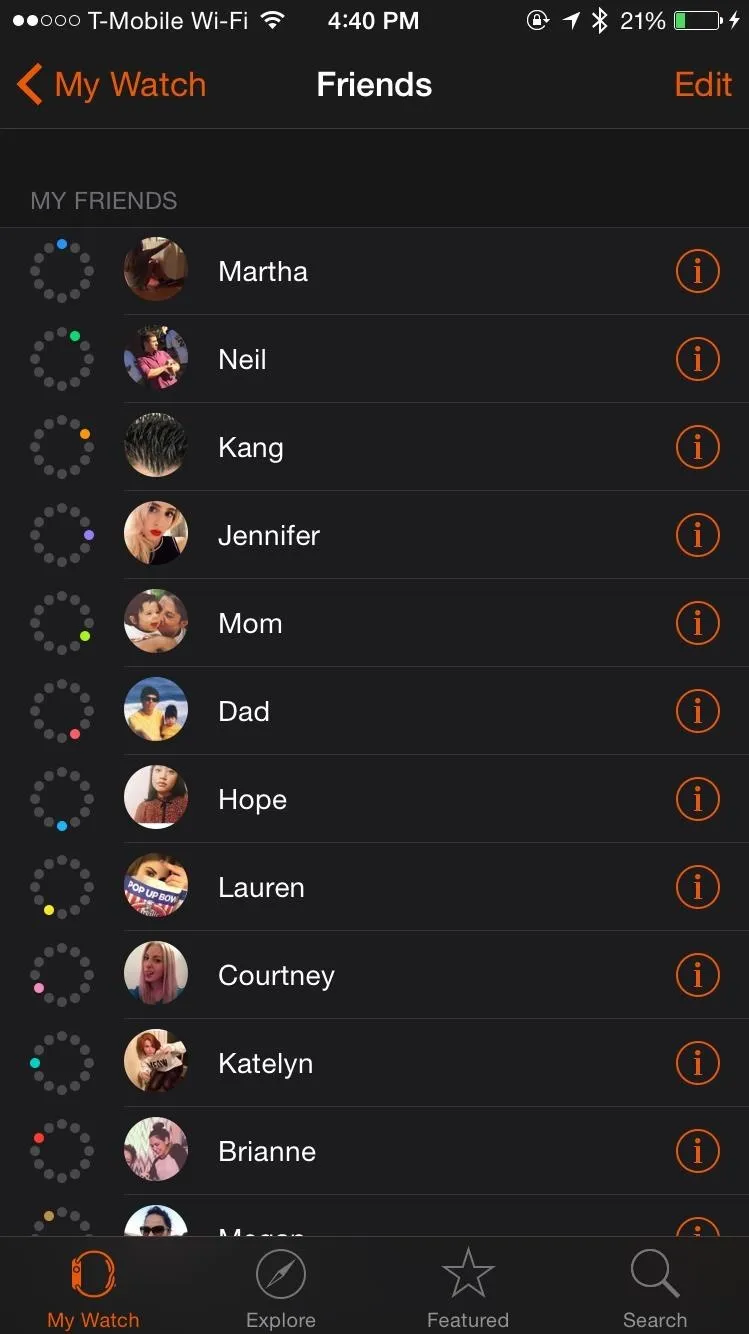


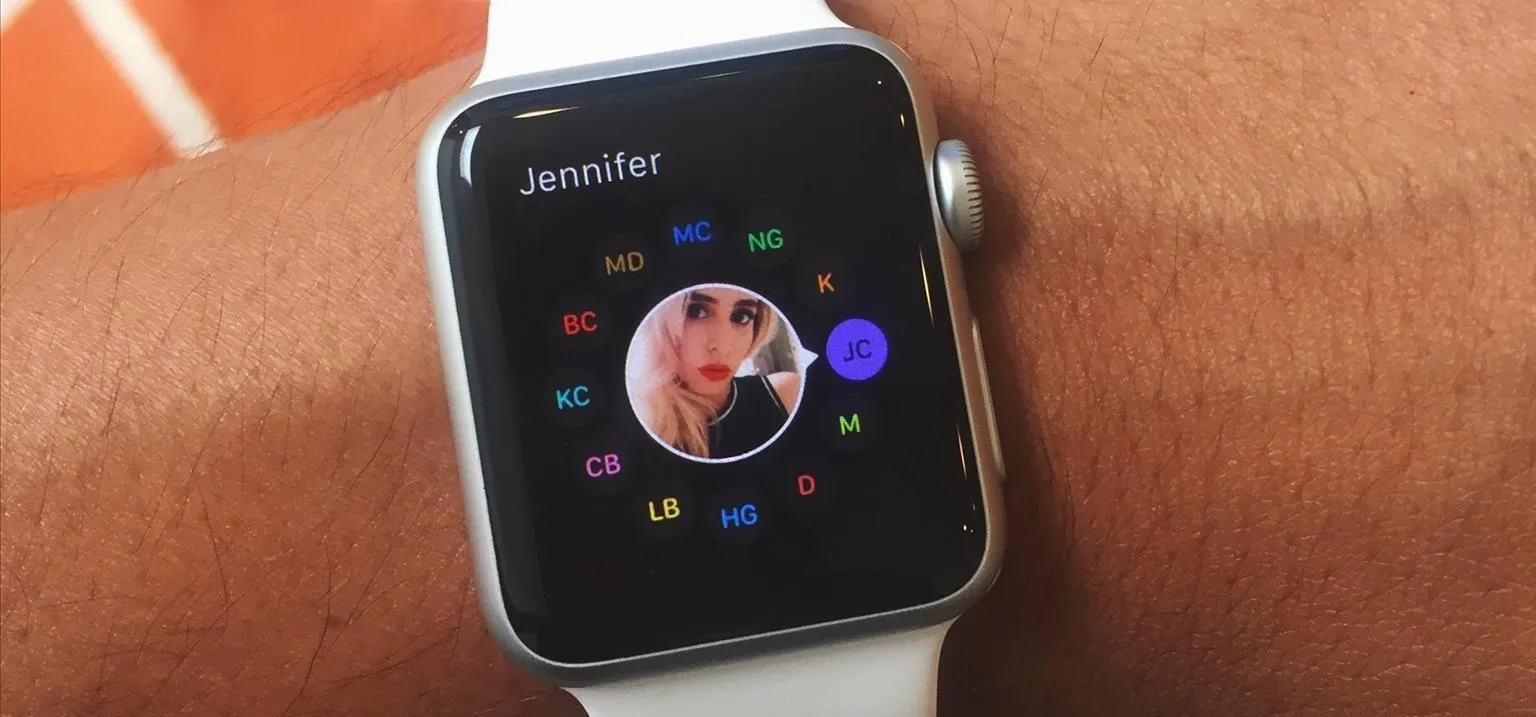
Now when you hit the side button to access your Friends list on the Apple Watch, you'll see all of the contacts you've added, in the order you placed them.
- Follow Gadget Hacks on Facebook, Twitter, YouTube, and Flipboard
- Follow WonderHowTo on Facebook, Twitter, Pinterest, and Flipboard
Cover image and screenshots by Nelson Aguilar/Gadget Hacks




Comments
Be the first, drop a comment!